How To Use MetaMask To Buy An NFT
February 12, 2022 - 6 min read
When interacting with web3 and NFTs, MetaMask is the tool you’ll use the most. MetaMask allows you to interact with NFT websites, store your crypto & NFTs, and buy, sell & trade coins. I’ll guide you through setting it up, keeping your coins safe, and even share some life hacks I’ve learned in my 4 years of crypto so you have a smooth experience.

View the video version of this blog by clicking here
The first step is setting up your MetaMask wallet. This involves downloading it from the correct source and using a pen & paper to write down your Secret Recovery Phrase (VERY IMPORTANT STEP, DO NOT SKIP)
To download MetaMask, we’ll use Google Chrome
1.) Visit www.metamask.io and download the Chrome Extension

2.) Pin MetaMask to your toolbar using the Jigsaw puzzle icon in the top right of Chrome
First, go to the jigsaw piece icon in the top right of Google Chrome.

Next, Click the pin button.

3. Press Create Wallet

4. Once you’ve downloaded Chrome, you’ll set up your MetaMask password. This password will only be used on the device you're downloading MetaMask on.

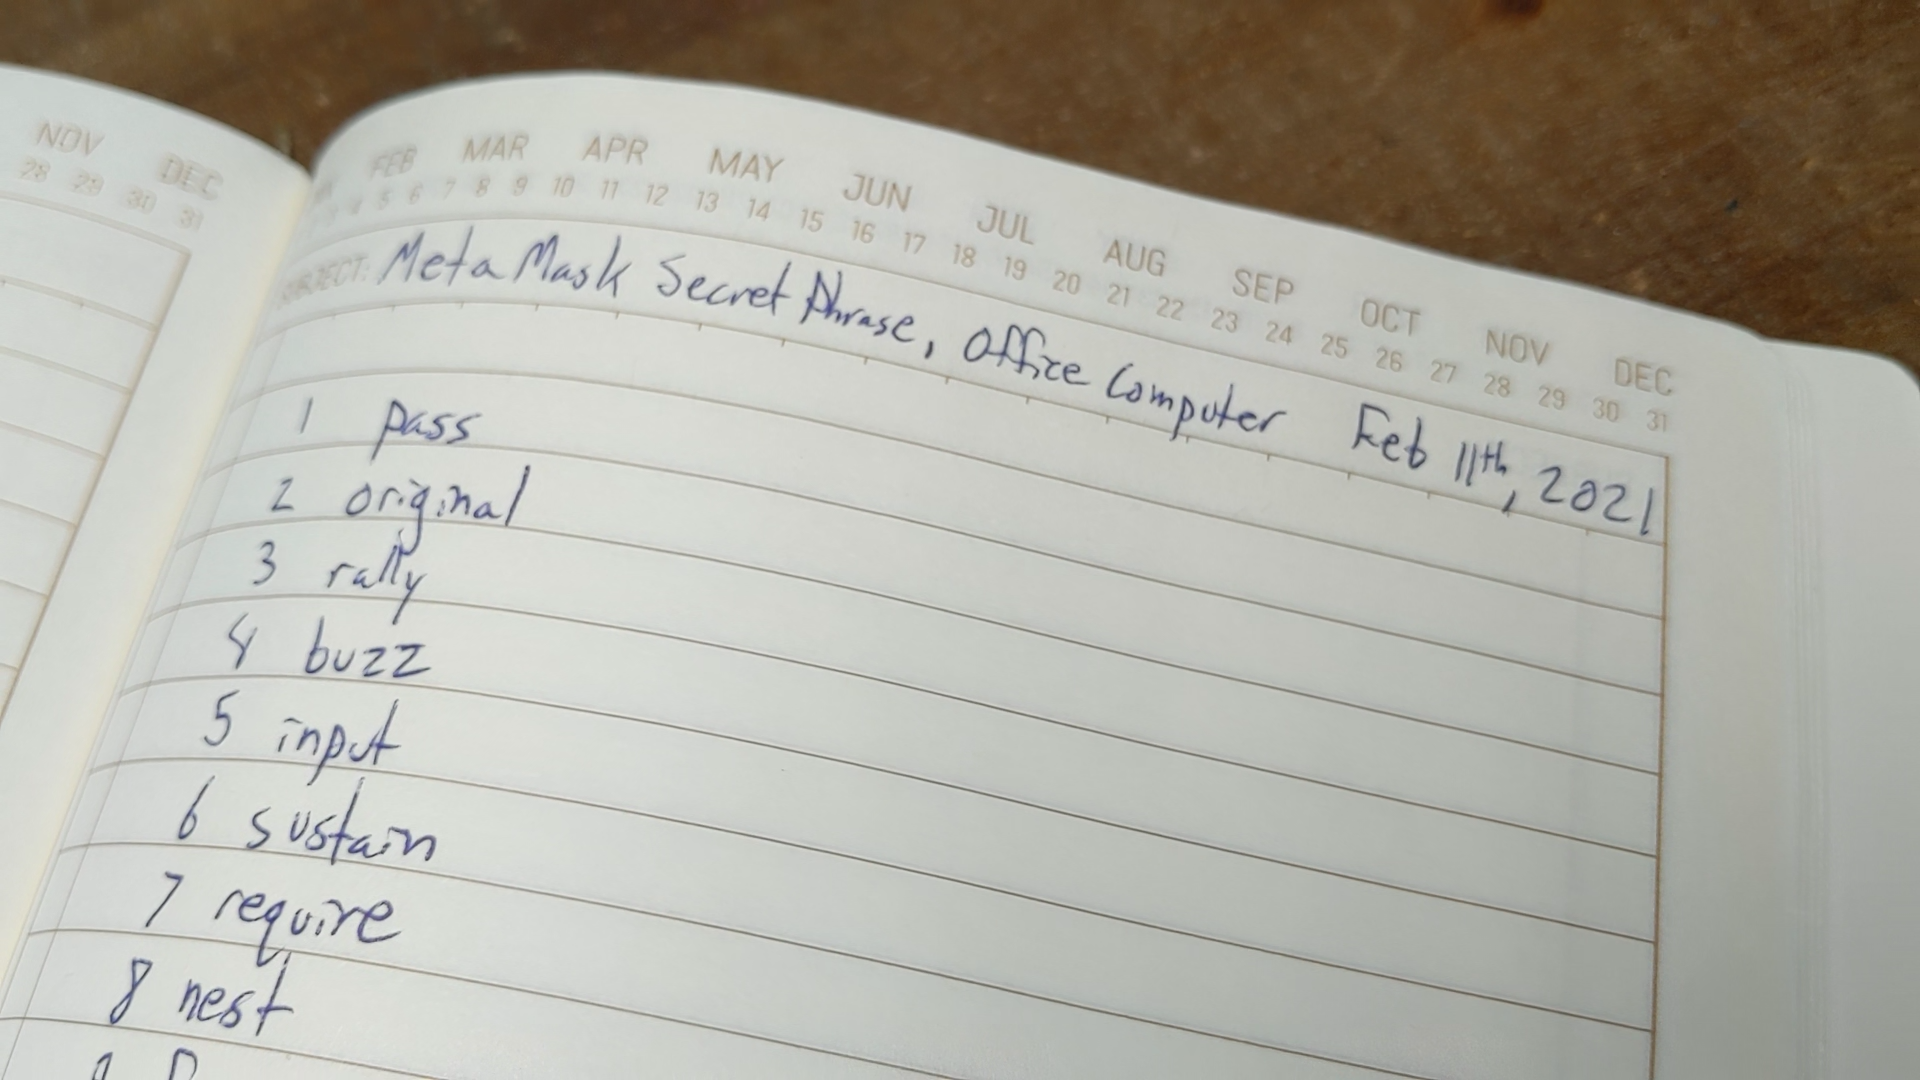
5. Write down your Secret Recovery Phrase on a piece of paper.
This part is very very important and should not be skipped.

The Secret Recovery Phrase is a 12-word phrase that you'll use to recover your wallet if the device you're on gets broken.
You should never copy/paste, share your Secret Recovery Phrase electronically, or take a picture of your Secret Recovery Phrase.
If someone got access to your 12 word Secret Recovery Phrase, they could steal all your coins and NFTs you've collected. We obviously want to avoid that. That's why we only write it down on paper and store it in a safe place. Never store it electronically and never share the 12 words with someone over the internet. If they ask for your 12 word Secret Recovery Phrase, they're trying to steal your money.
Additionally, it's best to write your 12 words on multiple pieces of paper and store them in completely different locations. For example, you could put one in your house, one in a bank vault, and one in a completely different location.
There's no way to get access to your funds on a different device without these 12 words, so we're taking extra precautions to always have access to the 12 words. We put them in multiple locations in case of unfortunate circumstances like a natural disaster or a fire in your house. You don't want to lose access to your one and only copy of your 12-word phrase, so we always make multiple copies and store them in different locations.
So go ahead and write down your 12-word phrase on multiple pieces of paper.
It's also a good idea to write down some extra details at the top, such as MetaMask Secret Recovery Phrase, the device MetaMask is installed on, and today's date

Once you've written your Secret Recover Phrase, remember...
Never share it with anyone
Store it on multiple pieces of paper
Store it in multiple places, best case on separate properties
6. Next, you'll re-enter the 12 words in the order they were presented

Congrats! Your MetaMask account is all set up :)

7. Now it's time to get some Ethereum in your wallet.
You can buy Ethereum directly through MetaMask by pressing the Buy button and using Wyre to buy via Credit Card/Debit Card


You can also get Ethereum in your wallet using the public wallet address displayed in MetaMask. You'll open MetaMask and press copy to clipboard. From there, you'll go to your exchange like Coinbase or Crypto.com and send the Ethereum to your wallet by sending it to the public wallet address.

Clicking Copy To Clipboard copies this: 0x403402dAB6C66f5B7A2e3076c810bc3F9C25b31a That is your full Public Wallet Address, which you'll use to receive Ethereum.
Once you buy/send Eth to your wallet, it may take a few minutes for it to show up in your MetaMask account

Quick tip: You can always create a new account for organization purposes by clicking the Account Icon in the top right, then clicking Create Account

You'll choose your account by clicking the Account icon in the top right and choosing the account you want to use.
8. It's time to buy an NFT! First, go to www.OpenSea.io

And then type in the collection you want to purchase from. For this example, we're buying an NFT in the 2018 project called The CryptoCards Collection

Then scroll through the collection and find the NFT you want to buy

9. Connect your wallet to OpenSea.
Connecting a wallet to a website gives the site permission to make changes to your wallet. For most widely trusted sites, there isn't much risk involved; the site will only do what you expect it.
However, there are some shady sites out there that want you to connect just so they can take the coins and NFTs from your wallet. These don't happen often, but it's still important to only connect your wallet to sites that you trust.
If you get to a point where you have $2,000+ in your MetaMask account, it might be time to upgrade your security with a Hardware Wallet. A Hardware Wallet acts as another layer of security. In order to send assets from your wallet, you need to have the physical device plugged in, and you'll press buttons on the device to prove it's really you who are initiating the transactions.
Safekeeping your own assets comes with its risks, and it's better to be safe than sorry.
To connect your wallet, go to your MetaMask icon in the top right > click the 3 dots >click Connected sites > click manually connect to site


10. Buy Your NFT!
When you're ready to buy, press Buy Now

Then Confirm Checkout

11. Gas Fees
Transacting on Ethereum costs Gas Fees.
This fee goes to computers all around the world called miners. These miners use their computers to secure the network.

$100 is a typical amount to buy an NFT right now. It will get better over time.
Because gas is pretty expensive, it's a good practice to keep a few hundred dollars in your wallet just in case you need to move assets around unexpectedly.
Gas Fees change a few times every minute. The more people using the network at that moment, the higher the gas fee is. Picture it like a highway, and if there's a traffic jam, you can avoid it by paying a higher fee.
You can avoid paying a high gas fee by transacting during a time when most people aren't transacting like a Sunday or a time when most of the world isn't awake.
12. Sign your transaction and wait for the transaction to process!


Congrats on buying an NFT!
13. View all your NFTs on OpenSea Account Page.
In OpenSea, click the colorful circle in the top right and click Profile

And we can see your NFT on your profile!

That's the end of the tutorial! Thank you for following along, and for any NFT questions/comments, find the authors on Twitter! :)
Jon: www.Twitter.com/jon_torrey Ezra: www.Twitter.com/ezrawithacamera
Newsletter
Enter your email address below to subscribe to my newsletter
latest posts


